

Quick answer
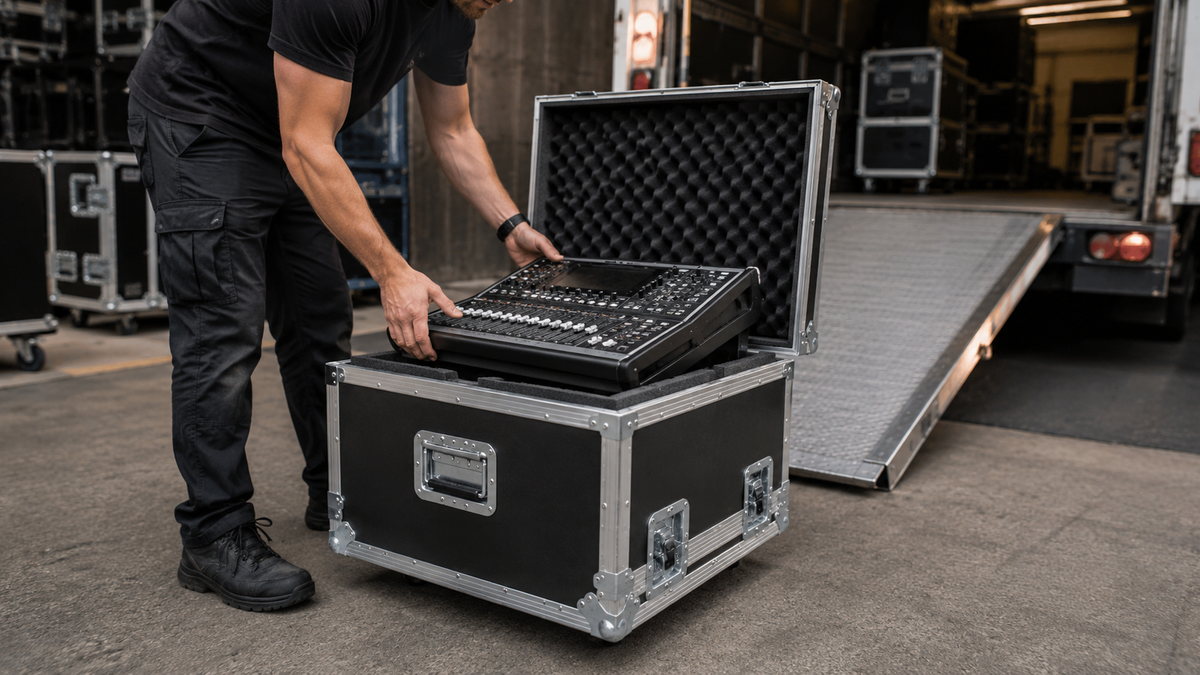
To pack a touring mixer for cross-country transport, seat it in a snug, foam-lined mixer ATA case built to the ATA-300 spec, secure all cabling and fader knobs, immobilize the console so it cannot shift, then load it upright and braced against the truck wall. A correct case fit is the whole game.
A digital console takes a 2,000-mile beating that a studio mixer never sees: forklifts, ramp drops, vibration that loosens every connector, and a truck that runs hot then cold across three climate zones in a day. The mixer is usually the single most expensive box on the truck and the one the show cannot start without. Pack it right and it boots clean at every load-in. Pack it wrong and you are troubleshooting a dead channel strip at 2 p.m. with doors at 7. This guide walks the full process, from picking the case to bracing it in the truck.
In this guide
Why cross-country transport breaks mixers
Three forces do almost all the damage. The first is shock: a single hard drop at the loading dock spikes hundreds of Gs through the chassis in a few milliseconds, and that energy goes straight into whatever is rigid, usually the fader rails, the connector PCBs, and the screen. The second is sustained vibration. Eight hours of highway buzz works connectors loose, fatigues solder joints, and slowly chews through any foam that is too soft to hold the console still. The third is the human factor at every transfer point, where your mixer gets stacked under something heavier, set down hard, or dragged across a ramp.
A gig bag or a moving blanket does nothing against any of these. The whole point of a road case is to absorb shock before it reaches the gear, spread load across a rigid shell, and hold the console so still that vibration has nothing to act on. For a touring schedule, that means a case built to a real standard, not a padded box. If you are outfitting a full production and want the wider context, our complete guide to ATA road cases for touring productions covers the rest of the rig.
New to mixer cases?
Start by seeing what a proper touring-grade case looks like for a console plus its outboard. Browse the range and get a feel for builds, depths, and configurations.
Browse rack and mixer ATA cases →What makes a real mixer ATA case
Mixer ATA cases are named for the ATA-300 specification, the airline transport standard that defines how a case has to be built to survive repeated commercial freight handling. The label gets used loosely, so it pays to know what the real build looks like. A touring-grade case starts with laminated plywood, not corrugated or molded plastic. For a heavy console that travels constantly, 3/8" plywood is the workhorse; 1/4" ply is lighter and fine for medium-duty runs but flexes more under stack load.
Around the panels run extruded aluminum edges, riveted into steel ball corners that take the impact when the case is dropped on an edge. The lid is held by recessed twist or butterfly latches that cannot snag or pop open in transit, and the whole thing rides on recessed spring handles and (on larger builds) caster plates with locking wheels. Inside, the protection comes from foam matched to the gear: a CNC-cut or layered cradle that holds the console by its shape, plus convoluted (egg-crate) foam in the lid to apply gentle top pressure. That combination of a rigid shell and a precise foam interior is exactly what separates a purpose-built case from a padded box, and it is what every case in our mixer ATA road case collection is built around. Because the construction is rated to take this abuse, a serious manufacturer stands behind it; Gravix backs its builds with a published warranty policy.
Pick the right case style for your console
Mixers do not come in one shape, so neither do their cases. The right style depends on the console footprint, whether you patch outboard alongside it, and whether front-of-house works from the case or pulls the mixer out. Here is how the common configurations stack up.
| Case style | Best for | Tradeoff |
|---|---|---|
| Standalone mixer case | A single console you remove and set on a table at FOH | No room for outboard or a patch in the same case |
| Doghouse mixer case | Running the console from inside the case with cabling routed out the back | Larger footprint and heavier than a flat case |
| Rack-mixer combo | Console on top, rack spaces below for stageboxes, power, and processing | Tall and heavy; usually needs casters |
| Pop-up / fold-out | Small rack mixers that work at an angle out of the case | Limited to smaller, rack-format mixers |
If you patch outboard right next to the console, a rack-mixer combo case consolidates the whole front-of-house position into one rolling box, which is faster at load-in and one fewer case to lose. For a fixed setup that travels as a unit, a double rack-mixer case on casters that fits most mixers gives you console-over-rack in a single roll-on package. And for an oversized analog desk or a wide digital surface, a large mixer case for consoles over 24 inches with a doghouse lets you run the show without ever lifting the surface out.
Measure and fit: getting the interior right
A case that is even an inch too big in any direction lets the console move, and movement is what kills gear. Measure the mixer at its widest, deepest, and tallest points, and account for anything that protrudes: rear connector hoods, side handles, the screen housing on a digital surface, and any meter bridge. Note where the heavy mass sits, because the foam under that area has to carry the most load.
The interior should hold the console by its shape so it cannot slide, rotate, or rattle. A good cradle uses denser, load-bearing foam at the base and softer convoluted foam in the lid to apply light, even top pressure when the case is closed. You want the mixer to seat with a firm, deliberate push and lift out without a fight. If the fit is loose, add layered foam rather than living with the gap. If the fit is too tight against a fragile edge like a fader bank or a screen bezel, relieve that spot so the foam supports without stressing the part. Rack spaces in a combo case follow the same logic: gear screwed to the rails and shock-isolated where the build offers it.
Compare your options
If your console rides over a rack of stageboxes and processing, look at how rack format affects depth, weight, and shock-mounting before you commit to a build.
Explore ATA rack casesHow to pack the mixer step by step
Once the case fits, packing is a short, repeatable routine. Do it the same way every night and the console travels safe whether you load it or a stagehand does.
- Power down and disconnect cleanly. Shut the console down properly, then pull every cable. Yanking patch under power stresses connectors and can pop a port.
- Protect the controls. Lower motor faders, and on consoles with tall knobs or a meter bridge, make sure nothing protrudes into the closing-pressure zone. The lid foam should touch the surface evenly, not press on a single fragile point.
- Cap and stow connectors. Use port covers or dust caps where you have them. Coil and bag any captive cabling so it cannot whip against the chassis in transit.
- Seat the console in the cradle. Lower it straight down into the foam, not at an angle. It should settle with a firm push and sit dead still.
- Confirm zero movement. Before the lid goes on, push the mixer gently in every direction. If it shifts, add foam until it does not.
- Close and latch fully. Engage every latch. A half-latched lid is how a console ends up on the dock floor.
Loading, labeling, and the truck

The case does its job only if it rides correctly. Load the mixer case upright, the way it packs, and brace it against a truck wall or a solid pack so it cannot tip or slide when the driver brakes. Never stack anything heavier on top of a console case; the foam and shell are rated to protect the gear inside, not to carry a few hundred pounds of cable trunk. Put heavy, low-center cases on the deck and keep the mixer in a stable spot in the pack where it will not get buried or climbed over.
Label the case clearly on more than one face: what is inside, which way is up, and a fragile mark if the console warrants it. A stencil or a printed panel survives the road better than tape, and on a multi-truck tour a consistent labeling scheme saves real time at load-in. Use the casters and handles as designed, push rather than drag, and take ramps slowly so the wheels do not slam at the lip.
When to go custom vs stock
A stock case is the right call when your console matches a common footprint and you do not need rack spaces or special routing. It ships faster and costs less. Go custom when any of these are true: the mixer is an odd size, you want a specific rack count under it, you need a doghouse cut for your exact cable run, you are branding the case for a touring brand, or you are outfitting several positions and want them identical. For a console that has to survive constant cross-country freight, the foam interior is the part most worth speccing exactly, and that is a custom build by nature.
Because Gravix builds to order, you are not forced to fit your console into someone else's box. You give the make, model, and the configuration you want, and the case is cut to it. That is the difference between a mixer that arrives show-ready in every city and one that you nurse along all tour.
Get a case cut to your exact console
Send your mixer make, model, and rack configuration, and we will build a touring-grade case sized to it, foam and all.
Request a custom quote →FAQ
What are mixer ATA cases?
Mixer ATA cases are road cases built to the ATA-300 transport standard to protect audio consoles in freight and touring. They use laminated plywood panels, aluminum edging, steel ball corners, recessed latches and handles, and a foam interior cut to the mixer's shape. That construction absorbs shock, spreads load, and holds the console still so vibration and drops do not reach the gear.
Is a 1/4" or 3/8" plywood case better for a touring mixer?
For a console that travels constantly and gets stacked or freighted, 3/8" plywood is the safer choice because it resists flex and crush under stack load. A 1/4" ply case is lighter and costs less, which suits medium-duty regional use or a mixer that is handled carefully. If in doubt on a full cross-country tour, the heavier-duty build pays for itself.
Do I need a doghouse on my mixer case?
A doghouse is a rear compartment that lets cabling exit the case so you can run the console without removing it. You need one if front-of-house works directly from the case or if you want to leave the mixer patched between rooms. If you always pull the console out and set it on a table, a standalone case without a doghouse is simpler and lighter.
How tight should the foam fit around the console?
Snug enough that the mixer seats with a firm push and does not shift when you nudge it, but not so tight that the foam presses hard on a fragile edge like a fader bank or screen bezel. The base foam carries the weight; lid foam should apply light, even top pressure when closed. Any visible gap means the console can move, so add layered foam until it sits dead still.
Can I get a mixer ATA case built for an odd or oversized console?
Yes. Because Gravix builds cases to order, a non-standard or oversized console can get a case cut to its exact dimensions, including a custom rack count, a doghouse for your cable run, and a foam interior matched to the surface. Send the make, model, and configuration through a custom quote and the case is built around your gear rather than the other way round.